node.js

Oh yes, we’ll need a database

I suppose this is the biggie. Since 1996 my database of choice has been the venerable NSF http://en.wikipedia.org/wiki/Notes_Storage_Facility#Database which is a Document Oriented Database. Coincidentally the rest of the world has now caught up and there are some more modern options available to achieve the same things now. The real flavour of the moment is MongoDB http://www.mongodb.org, like the NSF it’s document based and can be replicated between multiple locations. Unlike the NSF it is much more scalable and the old limitations that we were constrained by have largely been mitigated. Of course there is no such thing as a silver bullet, but really there is no comparison between the NSF and modern document oriented databases. You have no idea how sad that makes me, but it is true.

Anyway, back to the real world. Every application needs a database, and my choice in this case is MongoDB. As ever, this is not a tutorial, the MongoDB website provides quite reasonable documentation to get you going: http://docs.mongodb.org/manual/tutorial/install-mongodb-on-os-x/

Now, you could just go with Mongo directly, but in various tutorials I had read about MongooseJS as well. MongoDB is just a database, it doesn’t force you to implement schemas, validation, or really any structure to your data. It may well be the case that you don’t want any of that, in which case go for your life. The syntax for talking to MongoDB is very simple REST calls. But with the addition of MongooseJS we get another layer of abstraction and assistance.

The primary boon for me has been the creation of simple schema’s. Each of the document types in my application has a schema defined; I know what fields will be created, I can create default values for optional fields and I can also create server side validation rules in a nice structured way. It’s also really useful to have a standard way of running code every time a document is saved back to the database.

And at this point we have our first venture into the cloud. It’s very easy to get everything we’re talking about running on your local machine, but what about when you want to show it off to the rest of the world? In my case I’m working with Bruce so for him to test we need an environment. There are hundreds of options available to you, but as with all of these posts I’ll describe what I’m doing.


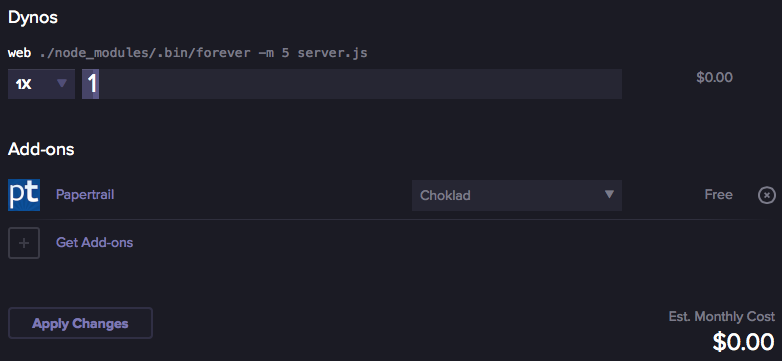
Heroku Console

Heroku Console

First we have the node.js hosting, where we’re using Heroku. It’s nice and simple to create a development instance that runs on a single dyno and then add plugins for things like console management, monitoring and so on. But we also need somewhere to host the database itself. For this we’re currently using MongoLab which again is very easy to set up a development database instance. The key thing about both of these development environments is that they are free. So I can do a Git push from my repo, and add configuration to the application to point to Mongolab for data storage and suddenly my application is running in the cloud.


MongoLab console

MongoLab console

This is all worryingly simple isn’t it? 
Jade HTML Template Engine

In the last post I mentioned that when you start using Express, you are nudged towards Jade to create your HTML.

At its simplest, Jade provides a way to make your HTML more terse. To produce HTML like this:

We would only need to enter Jade like this:

We can break up the contents of our pages, so in this example the head contents are defined in a different file and can be shared across multiple pages. The syntax is very simple, indentation is used to nest elements within each other and you can add ID, class and other attributes with simple markup.

But really the power is that you can also do simple scripting inside the Jade file. So you can conditionally load chunks of the page based on data that you pass into the page. And then you can also pass in variables to the Jade template to be used when building the HTML. In the example above, the title is passed into the page as a variable from the route configuration.

Of course you can bind field onto your database using similar techniques. 

The structure of my real world application has a layout Jade file which itself is made up of several Jade files: head, header, footer, and foot. In the head I have all of my CSS and web attributes. The header is the navigation header for the site. The footer is a static footer navigation bar and the foot contains all of the JavaScript files that need to be downloaded to the client. In between header and footer I can insert my content.

The momentum in the web development world is very much towards AngularJS at the moment which doesn’t really sit with Jade too well. It is possible to use both but they tread on each others toes rather a lot so it may end up being more trouble than it’s worth. But for my purposes Jade and jQuery are working well together for me at the moment.

Express web application framework

Having created a simple application and installed our first NPM package, now things start to get serious. We want to start building out our real application, there will be more than one page, we’ll need client side JavaScript and CSS files. Organising all of this is important, you will have hundreds of files before you know it. This is where Express comes in.

If we install the basic Express npm package then we can get one of the biggest advantages for us, that is routing. I can define URLs and URL patterns that make up my application and then map functionality onto each one as I see fit. As you get more advanced you can start defining middleware steps that test security before allowing the user to get to a page. It makes your application configuration orders of magnitude simpler to look after. From my point of view at the moment, if you wanted to create a node.js web application that didn’t use Express then I’d want a very good reason why.

The basic installation is very simple, simply edit your package.json file and add express as a dependency:

Then, from the terminal, run “npm install”. You’ll see a bunch of new files installed under node_modules and can now start modifying the server.js file:

The key section is the line that starts app.get. This tells the application that it wants to listen for GET requests at the URL “/hello.txt” and what to do when someone requests that page, in this case just return some Hello World text. If the user requests a different URL then they’ll get an error. And of course you can also configure your routes to listen for PUT, POST and DELETE requests. And hopefully at this point you’ll see what’s happening, you now have the simple ability to support CRUD in your application, whether that be from web browsers or creating a REST API.

In the real world you’ll want to move your application logic off to other files before the server.js file becomes too large and unwieldy, so you can equally have lines like this:

In this example I’ve moved the business logic into a file called hello.js that lives in a subfolder from the root of my application: app/controllers/hello.js. You can put all of your hello world application functions into that file to keep things nicely organised.

In fact I actually move the routes themselves off to a separate file, so that the server.js really is just the instantiation of objects rather than any real business logic.

But this is not the extent of what Express can offer you. If you’re starting from scratch you’ll probably want to server up static content like CSS, images, client side JavaScript etc. Express can manage all of that for you as well, but it’s easier to create a new application:


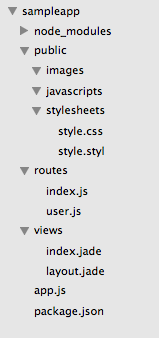
Structure of new demo app

Structure of new demo app

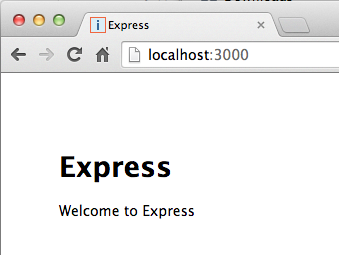
The first line generates a new application with placeholder content including CSS and Jade files and a place to insert your own client side JavaScript. This is more complex than it sounds because, of course, all of the routes to the static files have to be configured. Once the app has been generated you can move to its directory, and then run an npm install to get all of the required modules as defined in the auto generated package.json file. Finally we can run the application with npm start. This kicks off the application listening on port 3000 and we can load it in the browser.


The point of a framework is to make life easier, there is no reason you couldn’t set all of this up manually yourself, but there really is no reason to. The rest of the world seems to use Express as a standard and it does everything you could possibly want, well at least I’ve not come across anything that I couldn’t do yet. 

NPM or Node Module Packages

After getting your development environment set up and your fancy schmancy Hello World application running what next?

Let’s say we want to display a nicely formatted version of the current date and time. The current best of breed for date and time handling in JavaScript is called Moment and we can choose to use it either server side or client side. For our purposes here, we’ll use it server side, which means we need to install it into our application.

First we’ll want to create a file called package.json which acts as the main configuration point for the application. One of the things it stores is which NPM packages we have installed and which version of each package we want to use.

From the terminal we can now install moment: 

data-animation-override>
npm install —save moment

You’ll find the package.json file has been modified to include a dependency for moment and you’ll also see a new folder in your project called node_modules that contains the source code for the package. Rule of thumb is that you’ll never be editing files in that folder.

What we can now do though is start to use the newly imported package in our own code.

So we’ll add some extra code to the line which returns Hello World:

And when that runs in the browser we see something like:

data-animation-override>
Hello World
The day will end in 8 hours

As I write this there are nearly 75,000 packages available from NPM, so this is where you have to get into the mindset that if you are writing something new, then you are probably not writing something new. Leverage what has already been put out there.

Of course there are always issues. In your dependencies in package.json you’ll see that moment has been added with a version number, something like “^2.6.0”. You can also set this to be “latest”, but this means that whenever you run an “npm install” against your application, that NPM will look to see if a more recent version has been released and upgrade it for you. You need to be very aware of this. I recently ran a general install and found that Express had been upgraded from version 3 to 4. This broke my entire application and I had to roll back in Git to recover. So you have to become highly attuned to the impact of what is being upgraded. Things that are important to you, like Express, you should probably fix the version (by removing the ^ from the dependency), whereas things that are more utility helpers like moment you can probably just change to “latest”.

There is a huge amount more that you can do with NPM and it’s worth reading up on it. It’s probably your biggest friend when getting started with node. 

But first the development environment

I started a series of blog posts about my work with node.js last week. And of course the thing I forgot to mention is the actual process of development. 

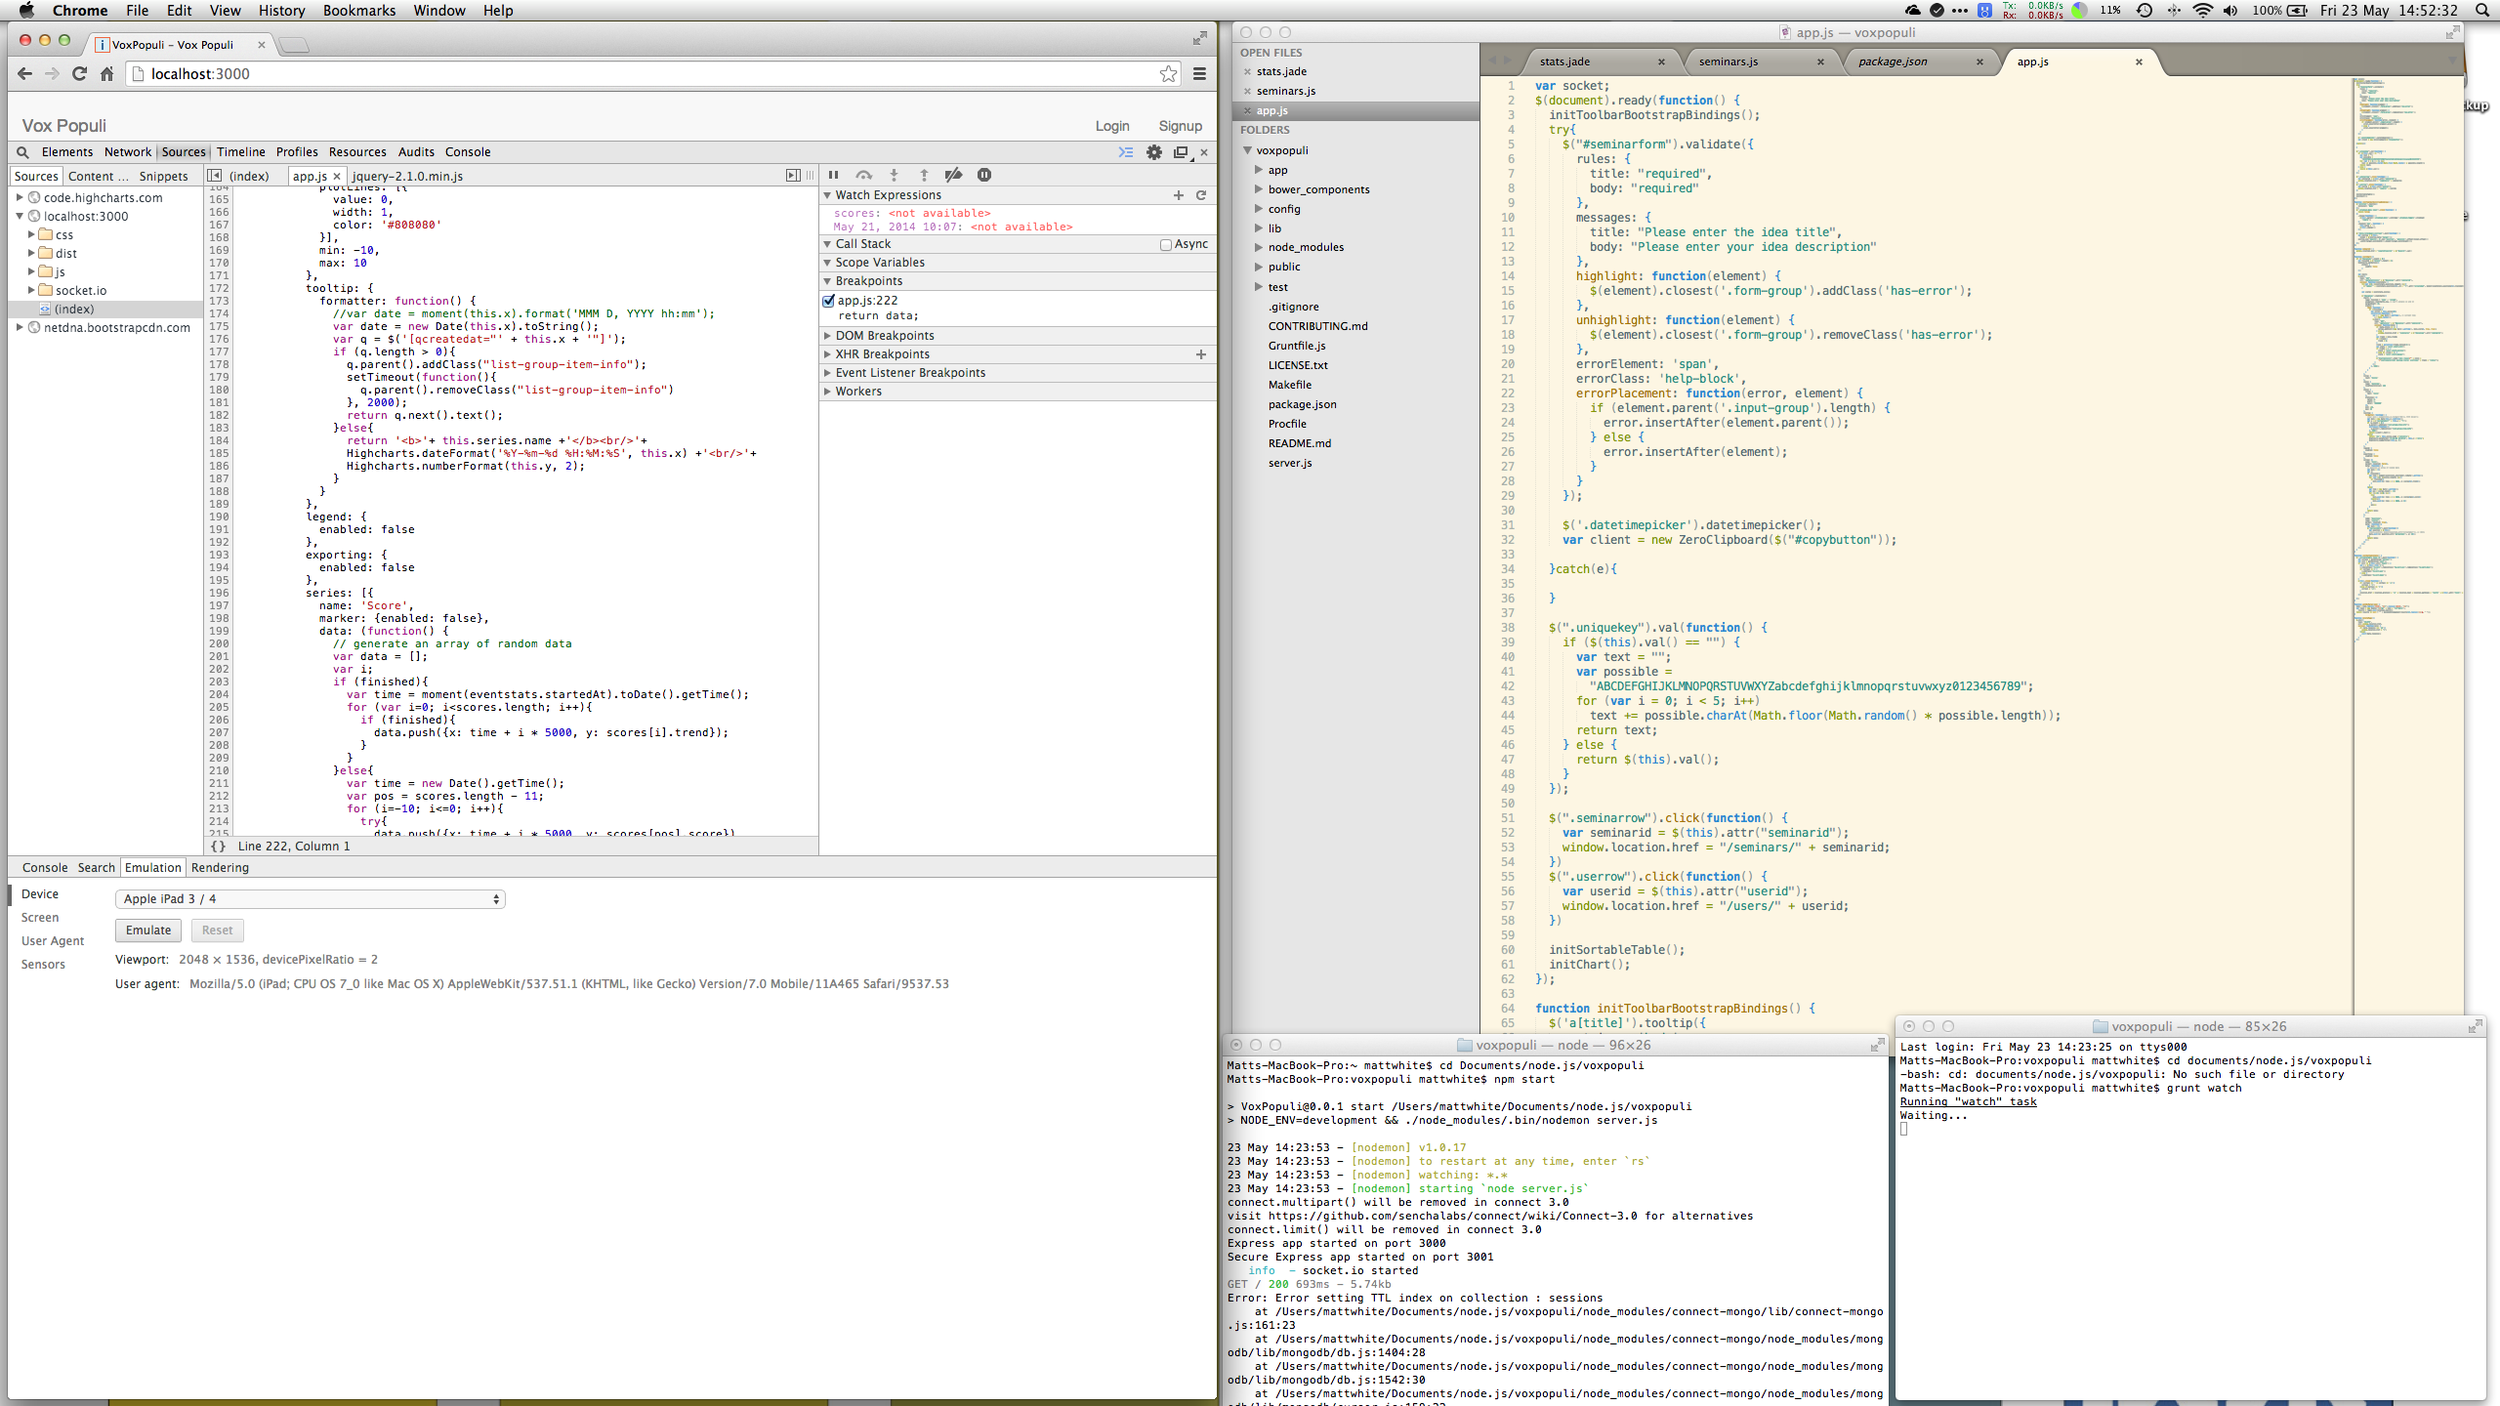
A lot of people seem to really like using Webstorm from Jetbrains. and it’s certainly a full featured tool. I tried it for ten days and just couldn’t get used to it. So I now spend my days living inside three different windows: Sublime Text for editing, Chrome for browser testing and the Terminal for running node.js.

If you’ve not yet used Sublime Text then it’s worth having a look, it’s a text editor but on steroids, so it will has awareness of different text file formats: JS, HTML, CSS etc etc and will offer basic code completion. But will also allow you to edit multiple lines of text at once, it has all sorts of plugins and so on.

Chrome has become my defacto standard for browser testing (although I actually use Safari for actual web browsing). Its developer tools are unmatched, and more recently it has also offered basic emulation of mobile devices. Definitely not the same as running on the real thing, but good for basic testing.

And then finally there is the terminal window. As my colleagues will testify, I am not a command line sort of geek, it just feels too much like a hair shirt to me. But with node.js development there really is no avoiding it so it’s worth learning a little. Although to be honest my usual workflow is to have two terminal tabs open: one in which I type “npm start” and the other in which I type “grunt watch”. The first of these launches my dev server running on port 3000. While it’s running in dev mode it will automatically pick up changes I make to source code and restart itself as required. I can also print out to the console if I need to do some debugging.


A screen capture of my working environment

A screen capture of my working environment

The latter command launches GruntJS which is a task runner. This allows me to have scripts to run every time I make a change to a subset of files. In my dev environment, I want my JS and CSS files to be automatically minified. And then I can also have it automatically run unit tests against my code, or JS Lint checks to make sure I’m not introducing too many bugs.

The other thing that you need to get working with very early on (if it’s not already baked into your workflow) is some sort of source control system. You will be editing a lot of files and it’s easy to lose track, so why not offload that task onto a tool. In my case (as with 90% of the development world it seems) I use Git and Github. This has the nice advantage that Heroku (my application hosting platform) also allows me to push up changes from my Git client as and when I need to. Talking of Git clients, I am switching between Source Tree and Tower these days (see what I mean about avoiding the command line when I can).

Of course everyone has their own way of working and the dev workflow for node in particular it seems like you could spend your whole life perfecting the workflow rather than actually doing any work so don’t get too hung up on it, but this is what works for me. 

Getting started with node.js

As you may know I’ve been writing Domino web applications in one form or another for 18 years now (good God that’s a long time). But over the last few months I’ve been working on a node.js application. I’ve learned a huge amount, but am still really a newb when it comes to node, so bear that in mind when you read my blog posts over the next few weeks and months.

The first question, I suppose, is “What is node.js?”. Well, the simple answer is that it’s a JavaScript engine that will do whatever you tell it. It will run on whatever platform you care to mention, I am using my Mac, but it will also run on Windows or Linux. The most popular use seems to be to write web applications, but you can equally write utilities for data migration or anything else that you can think of really. Everything you write is in JavaScript, and much like with XPages, you get to write JavaScript that runs on the server side and the client side.

The node.js community is huge and there are vast amounts of resources out there to get you going, so your first thought whenever you want to achieve something is “has someone already done this”. In most cases they will have. Enter NPM or Node Packaged Modules. You can simply install packages into your application and make use of them, much as you would with JAR files in Java.

What I have learned with node.js so far is that there is a package for almost everything you could want to do, and there are also frameworks to make managing your applications easier. This becomes important pretty quickly, otherwise your code will get out of hand. So over the next few posts I’m going to be talking about each of the major aspects of the application I’m working on, without actually talking about the application itself, that will come later I hope.

What this won’t be is a tutorial, there are plenty of great tutorials out there already, I’d recommend one of the following:

Be aware, node.js is evolving very fast, so things can get out of date pretty quickly, but the themes are still generally valid.

Your best bet for an over-arching framework is called Express. This is far and away the most popular framework for creating a web application. It recently upgraded to version 4, I am using version 3 for the moment so am already out of date!

You’ll probably want a database for your application as well. There is plenty of choice, there’s no reason, for example, why you couldn’t continue to use your NSF with a REST API in front of it, but the reality is that there are better options out there. Again the darling of the moment is MongoDB. This is a whole subject in itself, but in my case the application requirements are pretty simple and we’re used to thinking in terms of non relational databases so MongoDB makes a lot of sense right away. To integrate it into node.js and provide some simple structure to my application, I am using a framework called Mongoose.

That’s three elements then, server, application framework and database. What about the front end? The norm, it seems is to use AngularJS. Together these four elements create the MEAN stack (Mongo Express Angular Node). But this is where I diverge slightly. I still can’t quite get my poor old head around Angular, it still feels like too much work to me, so I am using plain old HTML in the form of Jade and jQuery.

Once you get into creating the application itself, then again we can turn to NPM and start making use of the great work that other people have done to quickly get going. For example, with authentication we can use Passport, for email integration we have Mailgun, for file attachments we have Amazon S3, full text searching there is Elastic Search, real time browser interaction we can use socket.io and for credit card processing there is Stripe.

The other thing to get involved in is hosting the application. I’ve mentioned a bunch of technology already, and so far I have it all running in the cloud for zero cost. It’s obviously all dev rather than production, but there are hundreds of choices, so again I’ll go through what I have chosen. But the headlines are: Heroku for node.js hosting, MongoLab for MongoDB hosting, Searchly for Elastic Search hosting, Stripe to process credit cards and Amazon AWS for file attachment storage.

There we go, nice and simple; just learn twenty new technologies in 3 months! Honestly it’s not as scary or difficult as it sounds. I mean if I can do it then so can you.

My plan over the next few weeks is to dip into each of the areas I’ve mentioned above and describe how I’m using them. If you’ve got questions or things to add then I’d love to hear them, this is as much a learning experience for me as it is for you I can promise you.